
How to Document a REST API: A Step-by-Step Tutorial

To document a REST API, you write structured descriptions of every endpoint, including its URL, HTTP method, request parameters, request body, and possible responses, then publish those descriptions in a format developers can read and test. With Apidoke, you write that structure in API Blueprint Markdown, get a live preview in the split-pane editor, and publish an interactive three-column reference in under ten minutes, no build pipeline required.
- API Blueprint is plain Markdown, so there is nothing proprietary to learn; you write headings and bullet points, and Apidoke renders them into a navigable reference with a live try-it console.
- The try-it console fires real HTTP requests from your browser, so readers can test endpoints without leaving the docs; auth tokens stay in the browser and never touch Apidoke servers.
- Version history is built in, so every save is recoverable and you can document multiple API versions inside a single project.
- No credit card is required to start; Apidoke is self-hostable and free to try.
What does "document a REST API" actually mean?
REST (Representational State Transfer) is an architectural style for networked applications defined by Roy Fielding. When we talk about documenting a REST API, we mean capturing four things for every endpoint:
- The resource URL (for example,
/users/{id}) - The HTTP method (GET, POST, PUT, PATCH, or DELETE)
- The request shape: path parameters, query strings, headers, and body schema
- The response shapes: one entry per status code (200, 201, 401, 404, 422, etc.), with example bodies
Good documentation also groups related endpoints (users, orders, products), introduces authentication once at the top, and provides at least one real request-and-response example per endpoint. The IETF HTTP Semantics specification (RFC 9110) is the definitive reference for what status codes mean; leaning on it makes your docs credible.
Before you write a single line: gather what you need
Documentation is easiest when you collect the raw material first. Before opening Apidoke, note down:
- The base URL of the API (for example,
https://api.example.com/v1) - The authentication method (API key in a header, Bearer token, basic auth)
- A list of every resource group and the endpoints inside each group
- At least one realistic example request body and the expected response body for each endpoint
- Known error codes and what triggers each one
Even a rough list in a notes app is enough. You will refine it as you write.
Step 1: Create a project in Apidoke
- Go to register and create a free account.
- Click New project and give it a name (for example, "Payments API v2").
- Apidoke opens a split-pane CodeMirror editor. The left pane is your API Blueprint source; the right pane renders a live preview that updates as you type.
The editor starts with a minimal scaffold so you are not staring at a blank page.
Step 2: Write the API metadata block
Every API Blueprint document begins with a top-level heading that names the API and, optionally, sets the base URL. The FORMAT pragma tells parsers which version of the spec you are targeting.
FORMAT: 1A
HOST: https://api.example.com/v1

# Payments API

Process payments, refunds, and subscriptions for your platform.
Authentication uses a Bearer token passed in every request header.
The plain Markdown paragraph below the heading becomes the introduction shown in the navigation pane. Write it for a developer who has never seen the API before.
Step 3: Add your first resource group
API Blueprint uses # Group <Name> to group related endpoints under a navigation heading. Groups map directly to the left-hand navigation column in Apidoke's three-column viewer.
# Group Charges

A charge represents a single payment attempt against a card or bank account.
If you have multiple resource families (charges, refunds, customers), give each one its own # Group block. This is the primary navigation structure your users will rely on, so name groups after the nouns in your domain, not after HTTP verbs.
Step 4: Define a resource and its URL template
Inside a group, you define a resource with a second-level heading (##) that includes the URL template in square brackets:
## Charges [/charges]

## Charge [/charges/{id}]
The {id} syntax follows the URI Template RFC 6570 standard. Apidoke recognizes it and renders the path parameter as an editable field in the try-it console automatically.
Step 5: Document each action (method and response)
An action is a third-level heading (###) with the HTTP method name. Under it, you declare request and response bodies using the + Request and + Response list items.
Here is a complete example for a POST /charges endpoint:
## Charges [/charges]

### Create a charge [POST]

Submit a new payment charge. Returns the created charge object on success.

+ Request (application/json)

    + Headers

            Authorization: Bearer sk_live_abc123

    + Body

            {
              "amount": 5000,
              "currency": "usd",
              "source": "tok_visa",
              "description": "Order #1234"
            }

+ Response 201 (application/json)

    + Body

            {
              "id": "ch_1A2B3C",
              "amount": 5000,
              "currency": "usd",
              "status": "succeeded",
              "created": 1716300000
            }

+ Response 401 (application/json)

    + Body

            {
              "error": "unauthorized",
              "message": "Bearer token missing or invalid."
            }

+ Response 422 (application/json)

    + Body

            {
              "error": "validation_failed",
              "message": "'amount' must be a positive integer."
            }
Notice that three response status codes are documented: 201 for success, 401 for missing or bad auth, and 422 for a validation error. Documenting only the happy path is the single most common mistake in API docs. Developers spend more time handling errors than successes; every 4xx and 5xx your API can return deserves at least one example body.

Step 6: Document a GET endpoint with path and query parameters
## Charge [/charges/{id}]

+ Parameters

    + id: `ch_1A2B3C` (string, required) - The unique charge identifier.

### Retrieve a charge [GET]

+ Request

    + Headers

            Authorization: Bearer sk_live_abc123

+ Response 200 (application/json)

    + Body

            {
              "id": "ch_1A2B3C",
              "amount": 5000,
              "currency": "usd",
              "status": "succeeded",
              "created": 1716300000
            }

+ Response 404 (application/json)

    + Body

            {
              "error": "not_found",
              "message": "No charge with id ch_1A2B3C exists."
            }
The + Parameters block tells Apidoke's try-it console to render id as a typed input field. The developer fills it in, clicks Send, and the console fires a real GET request to your API. The raw request and response appear immediately below, which makes your documentation self-verifying.
Step 7: Document authentication once, at the top
Repeat yourself as little as possible. Add one section near the top of your document that explains how authentication works for the whole API:
# Authentication

All requests must include an `Authorization` header with a valid Bearer token:

```
Authorization: Bearer <your_api_key>
```

Requests without a valid token return `401 Unauthorized`. Tokens are issued
from the dashboard and never expire unless revoked manually.
In Apidoke, tokens entered in the try-it console are stored only in your browser's memory for that session. They are never sent to Apidoke's servers, which matters for teams working with production credentials.
Step 8: Use a data structure block for reusable schemas
When multiple endpoints share the same object shape, define it once with a # Data Structures section and reference it by name. This keeps your document DRY (Don't Repeat Yourself) and makes schema changes easier:
# Data Structures

## Charge (object)

+ id: `ch_1A2B3C` (string, required) - Unique charge identifier.
+ amount: 5000 (number, required) - Amount in the smallest currency unit.
+ currency: `usd` (string, required) - Three-letter ISO 4217 currency code.
+ status: `succeeded` (string, required) - One of: pending, succeeded, failed.
+ created: 1716300000 (number, required) - Unix timestamp of creation.
Data structures are rendered as a schema table in Apidoke's content column, making it easy for consumers to understand field types at a glance without reading raw JSON.
Step 9: Preview, iterate, and check the live console
Apidoke's live preview updates on every keystroke. As you add endpoints, watch the left-hand navigation to confirm the group and resource hierarchy looks right. Then switch to the rendered view and test each endpoint with real values in the try-it console.
A practical checklist before you publish:
| Check | What to verify |
|---|---|
| Every endpoint has an example request body | Developers copy-paste these; they must be valid JSON or form data |
| At least two response codes documented per endpoint | One success (2xx) and at least one error (4xx or 5xx) |
| Path parameters declared in a Parameters block | Required for try-it console to render them as input fields |
| Auth header shown in at least one example request | Reminds developers what header name and format to use |
| Content-Type header present on POST/PUT/PATCH requests | Prevents 415 Unsupported Media Type errors when testing |
| Base URL correct in the HOST pragma | Try-it console uses this as the prefix for every request |
Step 10: Publish your interactive API reference
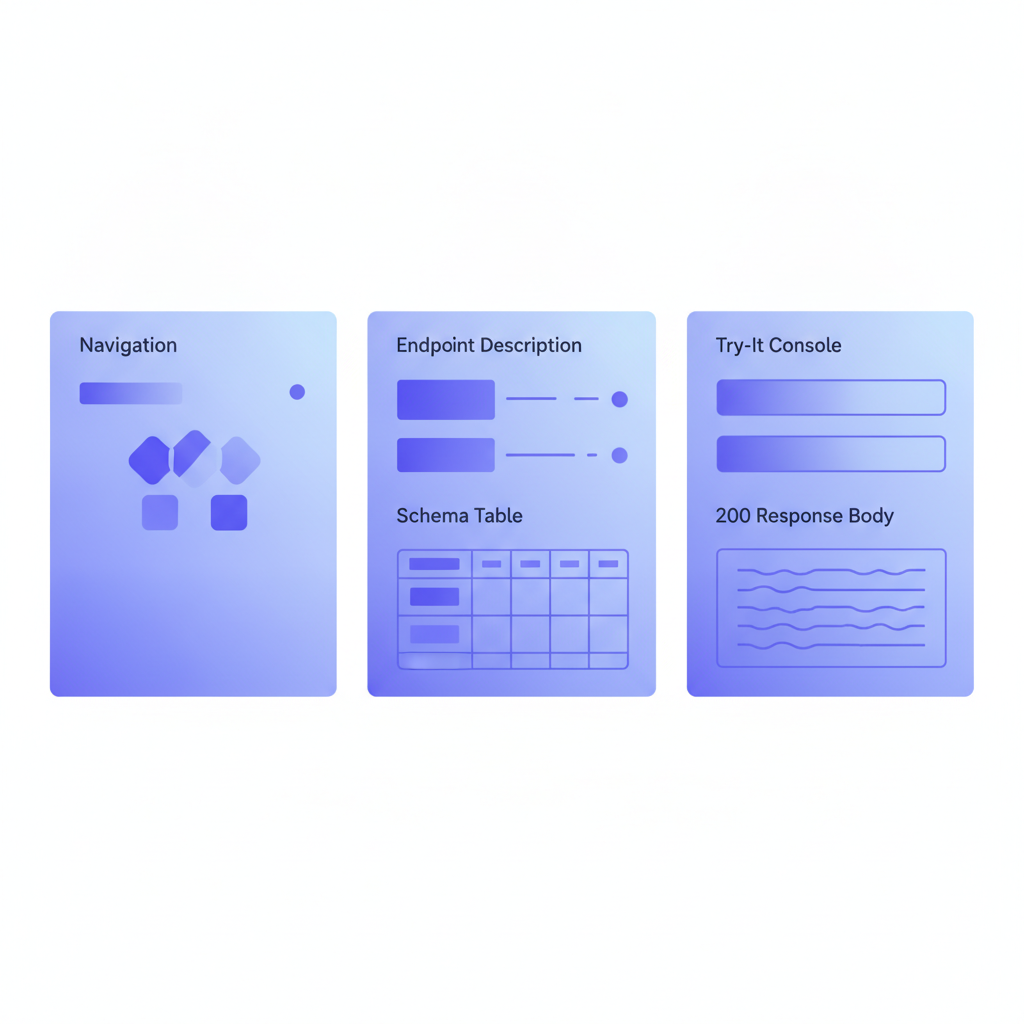
When the preview looks right, click Publish. Apidoke generates a public URL for your three-column interactive reference: navigation on the left, rendered content in the center, live try-it console on the right. Share that URL with your consumers or link to it from your README.
If you need to keep docs private or host them on your own infrastructure, Apidoke is fully self-hostable. The self-hosted API docs guide walks through the deployment options in detail.
For teams shipping multiple API versions, Apidoke's per-project version history lets you save named snapshots at any point. You can keep a v1 and a v2 reference alive simultaneously without duplicating projects. The API versioning strategies guide covers how to structure version naming in your Blueprint source.
What a complete API Blueprint document looks like
Pulling all the pieces together, a minimal but complete document for a two-endpoint charges API looks like this:
FORMAT: 1A
HOST: https://api.example.com/v1

# Payments API

Process payments for your platform. All requests require Bearer token auth.

# Authentication

Include your API key in every request:

```
Authorization: Bearer <your_api_key>
```

# Data Structures

## Charge (object)

+ id: `ch_1A2B3C` (string, required)
+ amount: 5000 (number, required)
+ currency: `usd` (string, required)
+ status: `succeeded` (string, required)
+ created: 1716300000 (number, required)

# Group Charges

## Charges [/charges]

### Create a charge [POST]

+ Request (application/json)

    + Headers

            Authorization: Bearer sk_live_abc123

    + Body

            {
              "amount": 5000,
              "currency": "usd",
              "source": "tok_visa"
            }

+ Response 201 (application/json)

    + Attributes (Charge)

+ Response 401 (application/json)

    + Body

            { "error": "unauthorized" }

+ Response 422 (application/json)

    + Body

            { "error": "validation_failed", "message": "amount is required." }

## Charge [/charges/{id}]

+ Parameters
    + id: `ch_1A2B3C` (string, required)

### Retrieve a charge [GET]

+ Request

    + Headers

            Authorization: Bearer sk_live_abc123

+ Response 200 (application/json)

    + Attributes (Charge)

+ Response 404 (application/json)

    + Body

            { "error": "not_found" }
This is roughly 60 lines of plain Markdown. Apidoke renders it into a full interactive reference with typed input fields, a live request console, and collapsible navigation, ready to share in under ten minutes.
Common mistakes when documenting REST APIs
Documenting only the happy path
A 200 or 201 response tells developers what to hope for. A 401, 404, or 422 tells them what to handle. Always document at least one error response per endpoint, and match the error body shape to what your API actually returns.
Using vague field descriptions
"The ID" is not a description. Write "The unique identifier for the charge, prefixed with ch_". Concrete descriptions eliminate support questions.
Forgetting query parameters on list endpoints
If GET /charges accepts ?limit=10&starting_after=ch_xyz, those parameters must appear in a Parameters block. Otherwise developers discover them through trial and error or by reading source code.
Letting docs drift from the implementation
API Blueprint lives in a file you control, and Apidoke's version history records every change. Make updating the docs part of your definition of done for any API change, the same way you treat tests. The guide to writing a good API changelog covers how to communicate changes once the docs are updated.
How does documenting a REST API differ from documenting GraphQL or gRPC?
REST documentation is organized around URL resources and HTTP methods. GraphQL documentation centers on a schema with types, queries, mutations, and subscriptions, and is usually generated automatically from the schema SDL. gRPC documentation derives from Protobuf definitions. API Blueprint is designed specifically for HTTP/REST, which makes it a natural fit for the resource-oriented structure most REST APIs follow. If your API is REST, API Blueprint gives you the most direct mapping between the spec and what you publish.
Frequently asked questions
How long does it take to document a REST API?
A single endpoint takes about five minutes once you have the request and response examples ready. A small API with ten to fifteen endpoints typically takes two to three hours for the first draft, including grouping, authentication, and error cases. Publishing in Apidoke adds under a minute on top of that.
Do I need to know API Blueprint before I start?
No. API Blueprint is Markdown with a few extra conventions, mainly the + Request and + Response list items. Most developers pick up the syntax in under an hour. The API Blueprint syntax cheat-sheet is a useful reference to keep open as you write.
What HTTP status codes should I document?
At minimum: the primary success code (200 for GET/PUT, 201 for POST, 204 for DELETE), 400 or 422 for validation errors, 401 for missing or invalid auth, 403 for insufficient permissions, and 404 for not-found resources. Add 429 if your API rate-limits, and 500 as a catch-all server error. RFC 9110 defines the canonical meaning of each code.
Can my readers test endpoints without setting up anything?
Yes. Apidoke's try-it console lets readers fill in parameters and send real HTTP requests directly from the documentation page. No local setup, no Postman collection, no copying curl commands. Auth tokens they enter stay in the browser and are never sent to Apidoke's servers.
What is the difference between a tutorial and a reference when documenting a REST API?
A reference lists every endpoint, parameter, and response code so developers can look up specific details. A tutorial walks a developer through a realistic workflow, like "create a customer, add a card, then charge it," showing only what they need for that goal. Both have value; most teams publish a reference first and add tutorials later. The guide to types of API documentation covers when to use each format.
Ready to put this into practice? Create your free Apidoke account and publish your first interactive REST API reference today, no credit card required.
Related reading: How to Make API Docs Interactive (Without a Toolchain)
Related reading: Publish API Docs Without Code: A No-Toolchain Walkthrough