
How to Make API Docs Interactive (Without a Toolchain)

To make API docs interactive, you write your endpoints in API Blueprint format, paste that Markdown-based text into Apidoke's editor, and publish. The result is a three-column reference page where developers read your docs, see code examples, and fire real HTTP requests directly from the browser, with no build pipeline, no CI job, and no separate hosting service required.
- Interactive API docs let developers send real requests (GET, POST, PUT, DELETE) and see live responses without leaving the documentation page.
- The only file you need is a plain-text
.apibdocument written in API Blueprint syntax; Apidoke handles the rendering. - Apidoke's try-it console runs entirely client-side, so auth tokens and request bodies never touch Apidoke's servers.
- The whole process, from a blank editor to a published interactive reference, typically takes under 15 minutes.
What "interactive" actually means in an API reference
A static API reference lists endpoints, parameters, and example responses as text. Useful, but passive. An interactive reference adds a try-it console, a UI component that lets a developer fill in a base URL, paste a bearer token, choose HTTP method and path, and click Send. The console fires the real HTTP request and renders the raw response, including status code, headers, and body, right on the page.
According to RFC 9110, an HTTP response carries a three-digit status code: 200 for success, 201 for resource created, 401 for missing or invalid credentials, 404 for a resource not found, and 422 when the server understands the request but rejects the payload. A good try-it console surfaces all of those, so developers learn the failure modes of your API without writing a single line of integration code first.
The try-it console explained post covers the mechanics in depth. This walkthrough focuses on the practical steps to produce one.
What you need before you start
You need three things and nothing else:
- A working API endpoint (local or live) that accepts HTTP requests.
- A free Apidoke account (no credit card required).
- Basic knowledge of Markdown, since API Blueprint is Markdown with a defined structure.
You do not need Node.js, a static-site generator, a CI pipeline, Docker, or a CDN. That is the point. Most heavy-weight documentation platforms assume you already have a build toolchain. Apidoke assumes you have a text editor and an API.
Step 1: Write your first API Blueprint file
API Blueprint (specification at apiblueprint.org) is a plain-text format. Every valid document begins with a format declaration and an API title, then organizes endpoints into Groups and Resources.
Here is a minimal but complete example for a hypothetical task management API:
FORMAT: 1A
HOST: https://api.example.com

# Task API

A simple REST API for managing tasks.

# Group Tasks

Resources related to tasks.

## Task Collection [/tasks]

### List All Tasks [GET]

Returns a JSON array of all tasks.

+ Response 200 (application/json)

        [
          {
            "id": 1,
            "title": "Write API docs",
            "done": false
          },
          {
            "id": 2,
            "title": "Publish to Apidoke",
            "done": false
          }
        ]

### Create a Task [POST]

Creates a new task. Returns the created task with its assigned id.

+ Request (application/json)

        {
          "title": "Review pull request",
          "done": false
        }

+ Response 201 (application/json)

        {
          "id": 3,
          "title": "Review pull request",
          "done": false
        }

## Task [/tasks/{id}]

+ Parameters
    + id (number, required) - The unique task identifier.

### Get a Task [GET]

+ Response 200 (application/json)

        {
          "id": 1,
          "title": "Write API docs",
          "done": false
        }

+ Response 404 (application/json)

        {
          "error": "Task not found"
        }

### Delete a Task [DELETE]

+ Response 204
Key structural rules to remember:
FORMAT: 1Aon line one tells any API Blueprint parser which version to use.# Group Namecreates a navigation section.## Resource Name [/path]defines a URL. Path parameters use curly braces:/tasks/{id}.### Action [METHOD]defines one HTTP action on that resource.+ Response 200 (application/json)followed by an indented body is the response example. Eight-space indentation inside the response block is required.
For a full reference of every keyword, see the API Blueprint syntax cheat-sheet.

Step 2: Paste your document into Apidoke's editor
Once you create a project inside Apidoke, you land in a split-pane CodeMirror editor. The left pane is your API Blueprint source; the right pane is a live preview that re-renders as you type. Syntax errors (a missing indentation level, an unclosed bracket in a URL template) highlight immediately, before you publish anything.
Paste the Blueprint text from Step 1. Within a second or two you should see:
- A navigation sidebar listing the "Tasks" group and each resource below it.
- A content column showing the action description, parameter table, and request or response body examples.
- A right-side console pane with method, URL, headers, and body fields ready to fill in.
If the preview is blank, check that your document starts with FORMAT: 1A and that the API title line uses a single #.
Step 3: Configure the base URL for the try-it console
The HOST metadata line at the top of your Blueprint (HOST: https://api.example.com) pre-fills the base URL in the try-it console. Developers can override it per request, which is useful when they want to point the console at a staging environment instead of production.
If your API requires authentication, the console has a Headers section. A developer pastes their token there:
Authorization: Bearer eyJhbGciOiJIUzI1NiIsInR5cCI6IkpXVCJ9...That token travels directly from the developer's browser to your API server. It does not pass through Apidoke's infrastructure at any point, because the try-it request is made client-side by the browser. This matters for teams working with sensitive staging credentials.
Step 4: Add request and response examples that teach, not just describe
A try-it console is only as useful as the examples that accompany it. The Blueprint format supports multiple named request and response pairs on a single action, so you can show the happy path and the error cases side by side.
### Authenticate [POST /auth/token]

+ Request Valid credentials (application/json)

        {
          "email": "dev@example.com",
          "password": "correct-horse-battery"
        }

+ Response 200 (application/json)

        {
          "token": "eyJhbGciOiJIUzI1NiIsInR5cCI6IkpXVCJ9...",
          "expires_in": 3600
        }

+ Request Missing password (application/json)

        {
          "email": "dev@example.com"
        }

+ Response 422 (application/json)

        {
          "error": "password is required"
        }

+ Response 401 (application/json)

        {
          "error": "Invalid credentials"
        }
When a developer opens this in the rendered viewer, they can click through each example response and see exactly what their integration code needs to handle. No guessing, no Slack message to your team asking "what does a 422 look like here?"
Step 5: Publish with one click
When the preview looks right, click Publish. Apidoke generates a public URL for your project. Share that URL with anyone: internal developers, external partners, or the open web. No deployment script, no S3 bucket, no Nginx config.
If you need to keep the docs private, you can self-host the entire Apidoke instance on your own infrastructure instead. The self-hosted API docs guide walks through that path. But for the majority of teams, the default hosted publishing is enough to get to interactive docs in a single afternoon.
Step 6: Save a version before you iterate
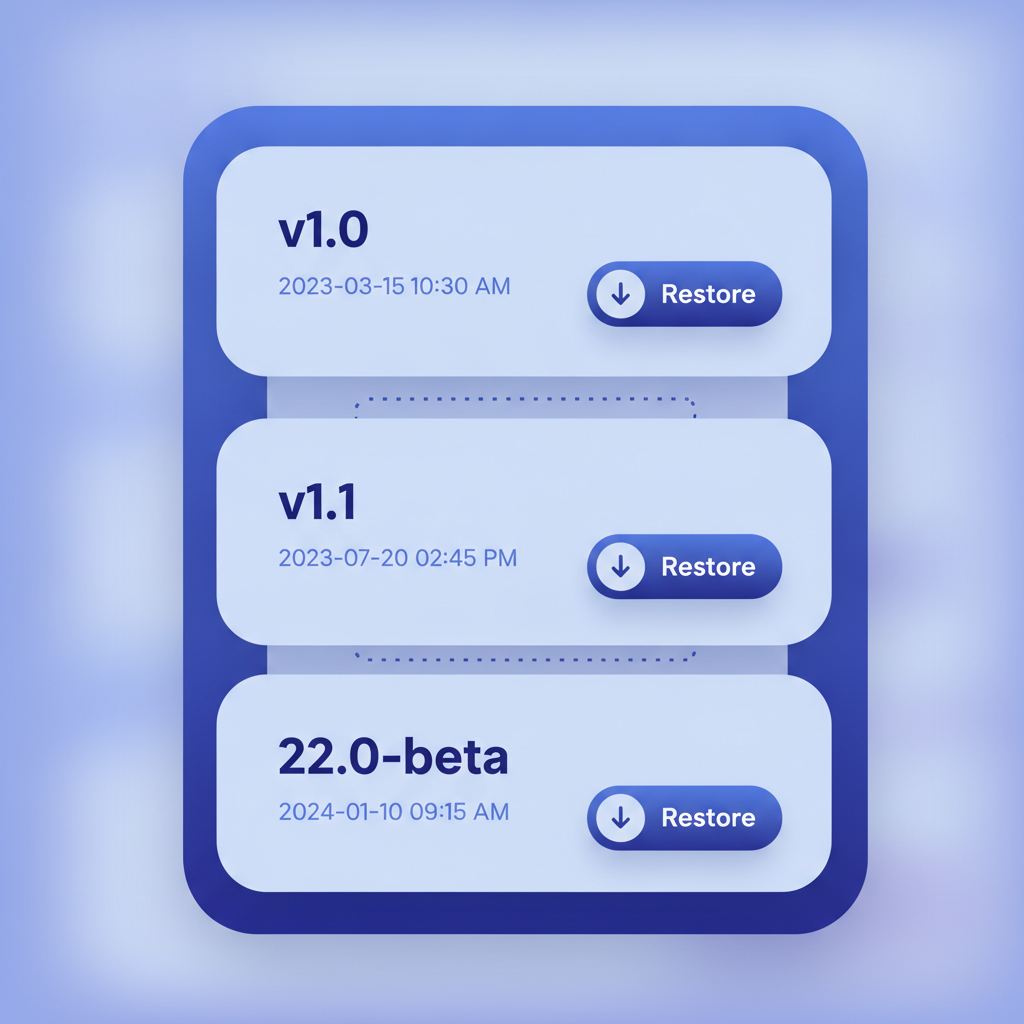
Apidoke keeps per-project version history. Before you make a breaking change to your Blueprint (removing a field, renaming an endpoint, changing a response shape), save a named version of the current document. That snapshot stays accessible at its own point in history, so developers integrating against v1 of your API can still read v1 docs while you write v2.
This matters more than it sounds. The most common complaint from API consumers is not missing documentation; it is documentation that changed without warning and without a readable history. Versioned snapshots are a lightweight way to address that, without running a separate changelog tool. You can pair them with a proper API changelog entry when a version represents a real release.
What does the finished interactive doc look like?
The published Apidoke page has three columns:
| Column | Contents | Who uses it |
|---|---|---|
| Left (navigation) | Groups, resources, and actions as a clickable sidebar | Anyone scanning the full API surface |
| Center (content) | Description, parameter table, request and response examples | Developer reading before integrating |
| Right (try-it console) | Method selector, URL, headers, body editor, Send button, live response | Developer testing the endpoint right now |
This layout is the same pattern Apiary established and that teams have relied on for years. Apidoke brings it back as a self-hostable tool because Apiary shut down its hosted service in 2023, leaving many teams looking for a direct replacement. If you are in that situation, the Apiary alternatives guide compares the main options.
Common mistakes and how to avoid them
Indentation errors
API Blueprint is whitespace-sensitive inside response bodies. The body content must be indented by at least eight spaces (not tabs) relative to the + Response line. A four-space indent is enough for the + Response line itself, but the body needs eight. If your preview shows a blank response panel, count your spaces.
Forgetting the HOST line
Without a HOST: declaration, the try-it console has no base URL to pre-fill. Developers can type one in manually, but pre-filling it removes friction and reduces the chance someone fires a request at the wrong environment.
Only documenting the 200 path
Developers spend more time debugging 400 and 500 responses than reading 200 examples. Document at least 401 (unauthenticated), 404 (resource not found), and the main validation error (often 400 or 422) for every write operation. The Blueprint multiple-response syntax shown above makes this straightforward.
Publishing before checking the preview
The split-pane live preview exists so you catch rendering problems before anyone else sees the docs. Scroll through the full preview, expand each action, and verify the response body formatting looks correct. It takes two minutes and saves a follow-up publish cycle.
How does this compare to a full toolchain?
| Approach | Setup time | Dependencies | Interactive console | Version history |
|---|---|---|---|---|
| Apidoke (API Blueprint) | Under 15 minutes | None (browser only) | Built-in, client-side | Built-in per project |
| Redocly + OpenAPI | Hours (Node, CLI, CI setup) | Node.js, CLI, hosting | Requires extra config | Git-based, manual |
| Mintlify | 30-60 minutes (GitHub sync setup) | GitHub, paid tier for features | Yes, on paid plans | Git history only |
| Hand-rolled Markdown + Swagger UI | Half a day to several days | Build tool, CDN, OpenAPI spec | Yes (Swagger UI) | None built-in |
The toolchain approach is not wrong. Larger engineering teams with dedicated docs infrastructure often need OpenAPI's richer type system and existing CI pipelines. But for a solo developer, a small team, or anyone who wants interactive docs running today rather than next sprint, the Blueprint-plus-Apidoke path removes the setup cost entirely.
Frequently asked questions
Do I need to know OpenAPI or Swagger to make interactive API docs?
No. Apidoke uses API Blueprint, which is a simpler Markdown-based format. You do not need to install any tooling or learn YAML or JSON Schema to get started. If you already have an OpenAPI spec, you would need to convert it to Blueprint format manually, since Apidoke works with API Blueprint only.
Will my API credentials be exposed if I use the try-it console?
No. The try-it console sends requests directly from the developer's browser to your API server. Auth tokens and request bodies never pass through Apidoke's servers, so they stay between the browser and your API.
Can I make my interactive docs private?
Yes. You can self-host Apidoke on your own server so the documentation is only accessible inside your network or behind your own authentication layer. The self-hosted setup does not require any connection to Apidoke's hosted infrastructure.
How long does it realistically take to publish interactive docs with Apidoke?
For a small API with five to ten endpoints, writing the Blueprint file takes roughly 30 to 60 minutes if you are new to the format. Pasting it into the editor, previewing, and publishing takes another five minutes. Experienced Blueprint authors can go from blank file to published interactive reference in under 20 minutes total.
What happens to older versions of my docs when I update them?
Apidoke keeps named version snapshots per project. When you save a version before making changes, that snapshot stays accessible in your version history. Readers on an older version of your API can still read the matching docs, and you can restore any snapshot if a new draft goes wrong.
Ready to publish your first interactive API reference? Create a free Apidoke account and go from a blank Blueprint file to a live try-it console in a single session, no toolchain required.